To whitelist an IP on a proxy plan, send the plan's order id and your public IPv4 address to POST /public/proxies/whitelist-ip. From then on that machine connects to the gateway with host and port only, no username or password. We show it on a Residential Basic plan; Mobile plans take the same call with extra options.
We ran the whole cycle on 20 November 2026 on a Residential Basic plan, first with curl and then from an AI agent through MCP. The answers below are from those runs; addresses and ids are replaced by placeholders.
What IP whitelisting does
A proxy gateway has to know who is connecting. There are two ways to tell it. With user:pass authentication every request carries a username and a password. With IP authentication the gateway checks the address the connection comes from against a list attached to your plan. Putting an address on that list is "whitelisting" it.
| Username and password | Whitelisted IP | |
|---|---|---|
| What the tool needs | Host, port, username, password | Host and port |
| Works from | Any network | The addresses on the list |
| Good for | Laptops, changing networks, targeting written in the username | Servers with a fixed IP, tools with no field for credentials |
IP authentication is the answer when software has no place for a proxy password, and when you would rather not keep credentials in a config file on a server.
Step 1: find your public IP
The address to whitelist is the public one your machine leaves from, not a 192.168 or 10.x address on your local network. Ask from the machine that will use the proxy. This endpoint needs no API key:
$ curl -s https://api.quanticdata.io/v1/public/ip-echo
{"type":"response","message":"success","payload":{"ip":"x.x.x.x", ...}}
Take the ip value. The whitelist takes IPv4 addresses.
Step 2: add the IP to your plan
You need two things: an API key from the dashboard and the orderId of the plan, which GET /public/proxies lists for every plan together with whitelistSlots, the number of addresses the plan can hold.
$ curl -s -X POST https://api.quanticdata.io/v1/public/proxies/whitelist-ip \
    -H "Authorization: Bearer $QD_API_KEY" -H "Content-Type: application/json" \
    -d '{"orderId":"ORDER_ID","ip":"x.x.x.x"}'
{"type":"response","message":"IP whitelisted successfully",
 "payload":{"ip":"x.x.x.x","whitelisted":true,"whitelist_ip":["x.x.x.x"]}}
The call is free. To see what is on the list at any time:
$ curl -s "https://api.quanticdata.io/v1/public/proxies/whitelist-ip?orderId=ORDER_ID" -H "Authorization: Bearer $QD_API_KEY"
{"type":"response","message":"success",
"payload":{"orderId":"ORDER_ID","whitelist_ip":["x.x.x.x"],"entries":[{"ip":"x.x.x.x","description":"API whitelist"}]}}Step 3: connect without credentials
The host and the port are the ones the generator gives for the plan. POST /public/proxies/generate with "format":"host:port:user:pass" returned a line that starts with residentialboson.quanticdata.io:9000 for our plan: with a whitelisted IP you use those first two parts and leave the credentials out.
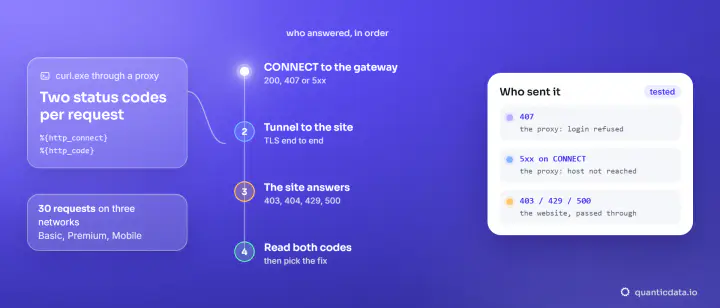
We sent the same request twice through that gateway, with host and port only. Before the address was on the list, the gateway asked for credentials (407). Right after the call above, with no waiting, it went through:
# before whitelisting
$ curl -s -x http://residentialboson.quanticdata.io:9000 https://ipinfo.io/ip
curl: (7) CONNECT tunnel failed, response 407

# after whitelisting, same command
$ curl -s -x http://residentialboson.quanticdata.io:9000 https://ipinfo.io/ip
x.x.x.x
The address printed is the proxy's exit, not yours: the request left through the residential pool. In a browser extension, a scraper or an antidetect browser the setup is the same: type the host and the port and leave username and password empty.
If you see a 407 after whitelisting, the machine is leaving from a different address than the one you added: run the ip-echo call from that machine again and compare. More causes are in 407 Proxy Authentication Required.
Remove an IP
When a server is retired or your address changes, take the old one off the list and add the new one.
$ curl -s -X DELETE https://api.quanticdata.io/v1/public/proxies/whitelist-ip \
    -H "Authorization: Bearer $QD_API_KEY" -H "Content-Type: application/json" \
    -d '{"orderId":"ORDER_ID","ip":"x.x.x.x"}'
{"type":"response","message":"IP removed from whitelist","payload":{"ip":"x.x.x.x","removed":true,"whitelist_ip":[]}}
A home connection usually has a dynamic address that changes now and then. A small script that reads ip-echo, compares it with the list and swaps the entry keeps the whitelist current; on a server with a fixed address you do it once.
From an AI agent, through MCP
The same three actions are one tool on the QuanticData MCP server: whitelist_ip, with action set to add, list or remove. An agent in Claude Code, Cursor or another MCP client first calls list_proxies to find the plan's orderId, then calls the tool. We asked our agent to add this machine's address, then remove it and list the result, on 20 November 2026:
whitelist_ip {"action":"add","orderId":"ORDER_ID","ip":"x.x.x.x"}
  {"ip":"x.x.x.x","whitelisted":true,"whitelist_ip":["x.x.x.x"]}

whitelist_ip {"action":"remove","orderId":"ORDER_ID","ip":"x.x.x.x"}
  {"ip":"x.x.x.x","removed":true,"whitelist_ip":[]}

whitelist_ip {"action":"list","orderId":"ORDER_ID"}
  {"orderId":"ORDER_ID","whitelist_ip":[],"entries":[]}
Two things make this go smoothly when you ask an agent to do it:
- Give it the IP of the machine that will use the proxy. A hosted agent runs somewhere else, so "whitelist my IP" has to come with the address, or with the output of the
ip-echocall you ran yourself. - Let it read the order id. The
orderIdcomes fromlist_proxies, so the agent should call that tool first instead of guessing an id.
How the tools reach the agent is explained in how MCP servers work.
Which plans use IP authentication
| Plan | How it authenticates | What the whitelist call answers |
|---|---|---|
| Residential Basic | Username and password, or a whitelisted IP | whitelisted: true |
| Mobile | Username and password, or a whitelisted IP with its own ports and targeting | whitelisted: true |
| Residential Premium, Premium ISP | Username and password | 200 with whitelisted: false |
Residential Premium and Premium ISP plans do not need a whitelist. When we sent the add call for a Residential Premium plan it answered 200 with the message "Whitelist not required for this proxy type (use username:password auth)." On those plans generate the proxy strings and use them as they are; the syntax is in how to use a proxy with curl.
On mobile proxies, the add call also accepts the number of ports, the protocol, country, region, city and carrier for those ports, and whether each port keeps a sticky session; the fields, and the other plan types that take a whitelist, are listed in the API reference. With user:pass strings the targeting lives in the username instead, which is why residential proxies and mobile plans offer both ways.